Well hooray for fun home decor projects! I just love what a good rug can do to a room–don’t you?
This is a picture of the first doily rug I made when I was still living in Mississippi. Today, I’m going to take you through the process. These images will make the most sense to you if you are familiar with how to chain a basic crochet stitch–if you’re not, go search some Youtube videos and practice a row or two before attempting this tutorial. If you have crocheted before, this should be fairly straightforward, and I’ll share with you my stitch count and such as we go along.
This is all you need for the project:
Huzzah! Clothesline from WalMart = $3.97 each. Depending on how large you make this rug, you will spend anywhere from $12-24. BOOM. New favorite project.
Alrighty then. This project begins with a basic slip knot–put the loose end between your pointer and middle finger, loop it back towards you around your pointer finger, then bring it around your thumb. Now you reach up through the loop on your thumb, grasp the string farthest away from you, and pull it through. After this expand the loop to have roughly a 2-inch diameter.
Chain 12 stitches around this loop. I tried to take pictures of how I created the first stitch or two for those of you who have less crochet experience.
Now it’s time to make the first “ladder” ring. (Note: This reveals my total lack of yarn and string craft expertise, because this pattern probably has a for-real name. I don’t know it. Womp womp!)
I begin this level by stitching in the “tail” of the slip knot, just to keep things tidy. In total you will chain 6 before beginning the first “rung” of the ladder.
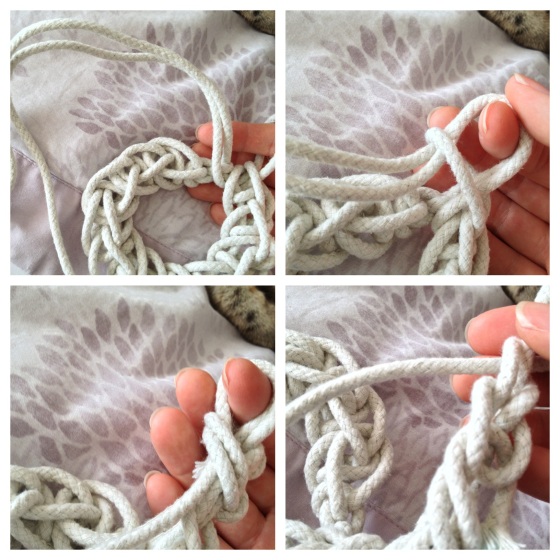
Here’s where we get fancy. First, loop the string once around your finger. Next, go back down to your doily and skip one stitch–go completely underneath the second stitch. In the first image my finger is pointing to it.
Once you’ve brought the string through the second stitch, you should have three loops on your finger. Loop one more (bottom L) and bring it through the middle two loops. Now you have two left (bottom middle). Loop once more (not pictured) and bring that through the remaining two loops so that only one is left (bottom R).
Whew! Breathe a sigh of relief. Chain 3 stitches, then loop once around your finger and go through the second stitch to connect back to the row way below you–create the second “rung.” Repeat until you have come all the way around the circle. Finish by connecting back to the middle of your original 6 chain:
Now we are ready for the first layer of “petals”! (Do you like this little insight into the crazy of my brain that tries to figure out its own terms for all of this?! How embarrassing… =)
(Also, please note how the cat appears and gets very interested in this fast-moving string in the following pictures)
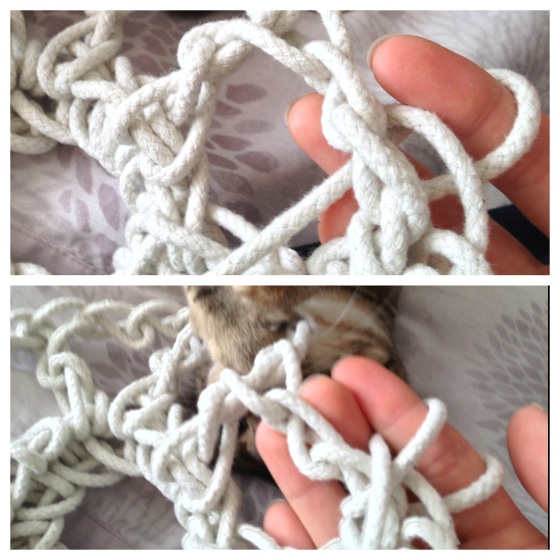
OK. Basically, for each petal, you will wrap entirely around the side of the ladder you created in the last row. You will also increase and then decrease the number of loops you put on your finger before beginning each chain–this way, the petal will grow fatter in the middle, giving it its petal-like shape. Each petal will have the following rows:
0 extra loops
1 extra loop
2 extra loops
2 extra loops
1 extra loop
0 extra loops
I feel like I’m speaking gibberish. The pictures above show a chain with 1 extra loop. (Does any of this make sense?!) It’s very much like creating the rung of the ladder, except you are creating about 5 rungs of various sizes directly next to one another.
Got it?
Dramatic lighting change when I return to the project 4 hours later and the sun has gone down.
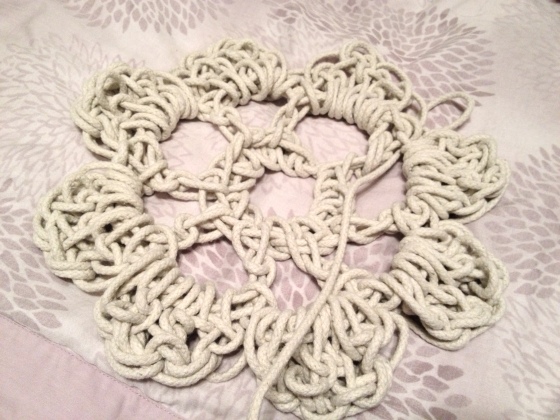
Here’s what it will look like once the first petal row is finished:
Lovely, if I do say so myself!
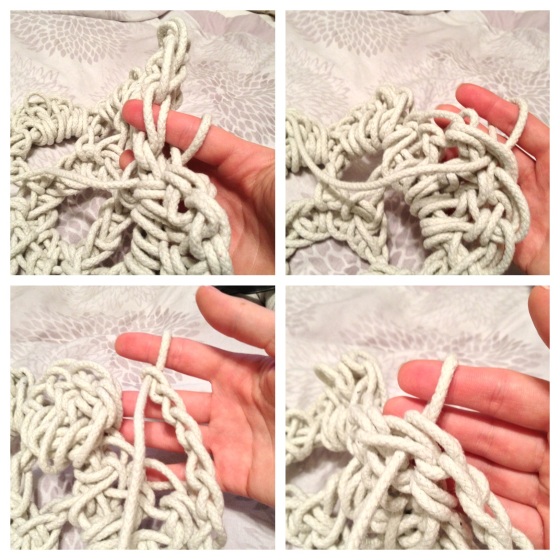
Once you’ve returned to the starting point again, you’re going to “climb” up three stitches to the top of one petal.
The top of that first petal is your jumping-off point. Chain 6 stitches, find the top of the next petal, and attach your chain there. Repeat all the way around. (No picture of what that finished step looks like. Sorry!)
Time for another ladder row. Repeat the steps for that, although this time I only chained 2 before I re-connected to the bottom layer. Chaining 3 made it too big; it got lumpy and wouldn’t lay right.
When I finish a bundle of string and need to start a new one, I feel lazy and just tie them together. You can also sew the ends together with quilting thread if you don’t want any raggedy ends sticking out.
Next I repeated a row of petals, although I added a third row of “2 extra loops” and spread each petal out over two “rungs” of the ladder. This just helped keep everything the right size/shape.
My final product today is a very small rug–the beauty of it is that you can pick it back up and add on to it at any time! I think I will in a week or two.
Basically, this project is incredibly versatile. If you know a bit about crochet, you can make up your own patterns and styles to try out as well. Try a Google image search for “crochet doily rug” and try not to be envious of the six dozen or so fabulous projects other talented people have made.
What do you think? Does it look easy enough? Too complicated? Let us know in the comments section below!


